You will learn about:
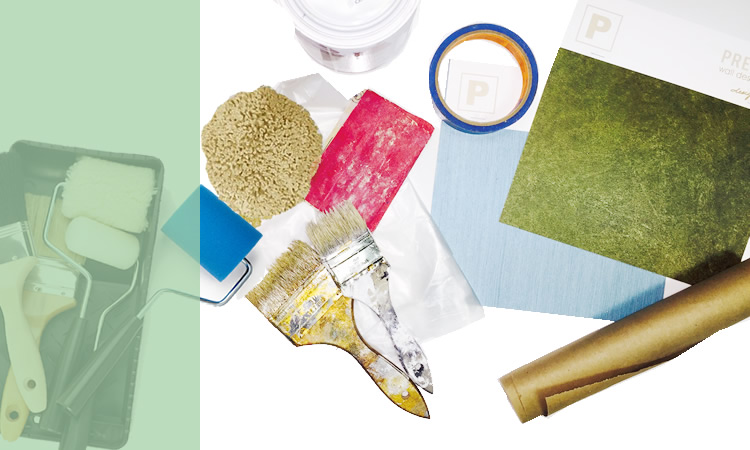
1 – Materials
- Surfaces- Primers
- Paints
- Tools
2 – Prep Work
- Taping- Priming
- Timing
- Fixing
3 – Starting
- Which technique to use- Where to start
- Be patient
- Final touches
4 – Final Steps
- Removing tape- Fixing mistakes
- Clean-up
- Final touches
- And fore sure:
Hands on! Let’s practice!
We selected 4 tecniques to practice.
Details:
We at Premium wall design Studio specialize in custom high-end finishes and techniques. For the past 18 years we’ve been serving the high-end market. For the first time we are creating The Artistic Techniques and Finishes Workshops, to teach you our secrets.We’re very excited to share our know-how and experience with you!
The Course is divided into 4 workshops: Novice, Midway, Leading and proficient, subdivided in 3 sections/classes of 4 hours each, totaling 12 classes. With a total of 48 hours we will be able to introduce, guide and teach, the steps required to create and apply unique artistic techniques on various different surfaces.
From preparing the surfaces to finishing touches, after completing the course you will feel confident to create and apply special tecniques to most surfaces with a professional look.
Class Novice 1
Divided into 4 steps + hands on, novice 1 will teach you the 1st important steps which will serve as the foundation to achieve professional results:
1 – Materials
In this step you will learn about the most common surfaces we apply the finishes to, as well as the proper primers and paints we use on each of them. We will also cover how to choose the right tools to achieve desired results.2 – Prep work
Preparation of the surroundings where you’re going to be working as well as the surface chosen for the application are together one of, if not the most important part of the whole process. Starting with the tapes that can and should be used and how to use them, passing through the proper use of the primer and wrapping up with timing and fixing little things in the base surface to prepare for application.3 – Starting
One important part of the process is choosing the technique and here in this section we’re going to discuss the better ways to help you decide which ones to use and where to start to achieve the highest quality result. Being patient in the process is key because sometimes we feel like we’re not quite getting the look we want. At this point we’ll discuss when it is time for the final touches and how to do them4 – Final points
After the technique is finished is time to finalize the pro look. Here you learn the basis for finalizing the work as a professional. Removing the tape and fixing mistakes are really tricky steps sometimes and learning a few tips makes a big different. Time for the clean-up and final touches that will make not only feel like a pro, but will have others see you as a pro!
Hands on 1
Hands on time!In this section we selected 4 techniques to start practicing the pro-effect.
Simple techniques that will be taught to have a professional look!
Techniques:
- Sponging
- Plastic Bag
- Plastering
- Stenciling
Don’t forget that these techniques will have a professional touch, don’t be fooled by the names!
There is a great chance you’ll be surprised!
Class Novice 2
Based on the same 4 steps used for novice 1. Divided into 3 steps + Hands on, in novice 2 you will deepen what you learned in novice 1. In this section of the course we’ll go in each portion and add more challenging details as we move along. Here we’ll reinforce the initial steps that serve as your base, but with additional information to prepare you for more difficult encounters. As always, we’ll strive for professional results.1 – Materials
In this step you will learn more about variations of basic surfaces to apply the finishes to. We’ll go also over proper primers and paints. Afterwards, we’ll review how to use each of them while adding complexity, as well as discuss choosing the right tools to achieve desired results.
2 – Prep work
In this step we will go over what we started on novice 1.2 and 1.3 and move on to more ways of preparing surroundings and surfaces for the application of techniques. We’ll also discuss in more detail when and where to use any given technique.
3 – Final points
Here is this final steps section. As we finish applying the technique, we’ll review details and practice different types of touch-up tricks to achieve a professional look. Removing the tape and fixing mistakes afterwards will be addressed here with more problem fixing instructions. Time for the clean-up and reviewing final touches. You will start to feel more confidence. You can do this!Hands on 2
Hands on time again!
In this section we selected 4 more technique to start practicing the pro-effect.
A little less simple than the ones in the prior section. You can handle it!
Techniques:*
- T-shirt ragging
- Plastic Bag 2
- Venetian Plaster
- Stenciling 2
*techniques still being determined – this list might change
Class Novice 3
Based on the same 4 steps used for novice 1 and 2.Now confidence is really picking up! You’re starting to feel like: I got this!
Divided into 2 parts + Hands on, novice 3 will deepen your knowledge even more to get you ready for the intermediate steps of the Mid Way Course. You will leave novice 3 ready to advance to more intricate and detailed finishes.
1 – Materials
It’s time to move to more challenging materials. In this step you will learn about more surfaces to apply the finishes to and continue learning how to prepare them for the application of the techniques, again, using proper primers and paints and instructions on how to choose the right tools. Always with the best result in mind.
2 – Prepping and starting
By now you should be more than ready for this! Preparing these new surfaces will be the kick start for the application of the techniques. Once more we’ll quickly review taping, priming and base coating the surfaces to move along to practicing techniques. Things will be getting more exciting by the minute!
Hands on 3
Wow! Here we are…the last portion...soon you won’t be a novice (beginner) anymore!
Let’s get right into it!
Techniques:*
- Wrinkle tissue paper
- Brick design plastering
- Venetian Madre Perlatto
- Antique Relief Stenciling
*techniques still being determined – this list might change
Class Novice 4
Hands on only!PRACTICE, PRACTICE, PRACTICE!
So here we are...Time to gather all that was learned and dedicate the time to perfect and create your own samples.
This is the time we relax and get your creativity going and feel confident on yours own capabilities!
Creativity is in all of us...Creativity is learned! Be inspired!